
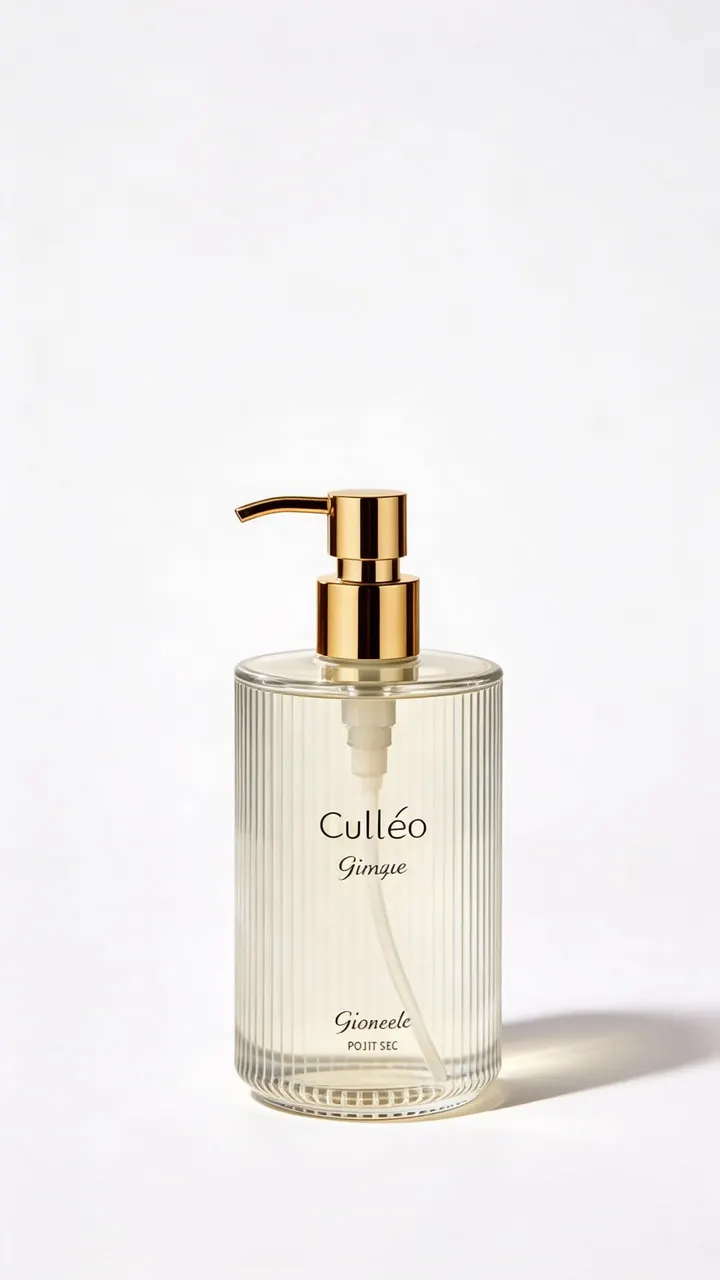
Start with the product photo you want viewers to recognize. A short motion shot can show a product in context or help introduce it at the beginning of a demo. Decide what the shot should reveal before choosing the movement.
Frame the product for the move
Leave room around the object in the direction the camera will move. For a slow push, keep the product away from the edges so the tighter framing has room. For a sideways reveal, leave open space on the side where you expect the background to become visible. Crop the source to match the final video ratio before uploading it.
If exact packaging text matters, prepare a separate still to use in the edit. The animated clip can establish the product, and the still can give viewers time to read the label.
Frame different products differently
A bottle or skincare package usually needs a clear vertical silhouette. Leave space above the cap and below the base if the camera will move closer. Keep the face of the packaging large enough to inspect in the preview. The bottle reference at the top of this article is an example of a vertically framed source. It illustrates the starting composition for a product reveal.
For jewelry, a watch, or a compact device, use a closer crop with a visible edge and a simple background. If a reflection is an important part of the product, decide whether it should move with the light or stay consistent. A small change in viewpoint can make metal look different from frame to frame. Start with a locked camera and a restrained lighting change if the exact outline needs to remain clear.
Clothing and soft goods benefit from enough space to see the whole shape. A sleeve or hem can move while the rest of the garment stays steady. Describe the part that moves so the generator has a specific action to follow. For food and drinks, decide whether the viewer should see the whole plate or one detail. A close shot of steam rising may work as an insert, while a wider shot establishes what is being served.
Before uploading, look at the image at the size it will appear in the final video. If the product is already hard to distinguish at that size, simplify the background or enlarge the subject. This is also a good time to decide where any captions will sit. Leave clear space for the text in the actual crop you intend to publish.
Start with one camera action
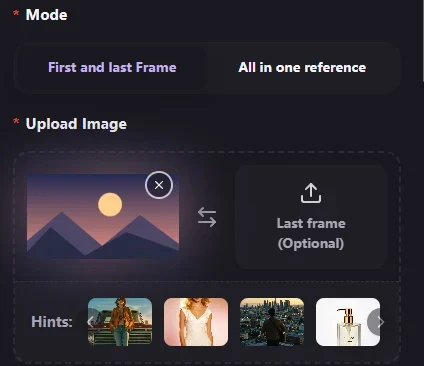
Upload the photo as the first frame in the image-to-video generator. Try a prompt like this.
Slide the camera slightly to the right. Keep the bottle upright and still, with the same lighting and background.
Generate a short take first and check the estimated credits before you submit. Compare the bottle silhouette and cap in the first, middle, and last frames. If the shape shifts, try a shorter slide or a more direct view of the product.
The first-frame screenshot below shows the upload slot and optional last-frame slot. It uses the sunset illustration from the main tutorial. The same workflow applies when you select your own product photo.
Choose between one move and several shots
Use one camera move if the demo needs a single reveal. A gentle push works when the product is already visible and you want the viewer to notice a detail. A short slide can show a side edge while keeping the product in the center of attention. Describe the camera movement and the detail that should stay stable. Keep the prompt easy to evaluate on playback.
Use separate clips when you need a wide introduction, a close-up, and a view of the product in use. Prepare a source image for each angle. Give each clip a job, then review how the end of one shot cuts into the start of the next. A wide image may be a good starting point for a slow push, but a dedicated close-up gives you better control over which detail fills the frame.
Keep exposure, background color, and product placement consistent across the source images when the shots belong to the same scene. When you compare takes, change one setting at a time. Use the same prompt to compare two models, or keep the same model and change the camera speed. Save the source and the settings for any take you intend to reuse.
Decide whether the take is usable
Play the clip at its intended size and speed. Check whether the viewer can recognize the product in the opening second. Pause at the middle and end to inspect the shape, color, and any lettering that has to remain legible. If the product changes size or starts to tilt without being asked, try a smaller move with clearer wording about what stays fixed.
Check the shot against the role it will play in the edit. An opening shot needs a clear first frame. A detail cutaway needs a steady view long enough to understand the detail. A clip behind captions needs a quiet area for text throughout the usable portion. Trim the beginning or end when the middle works and the cut still looks natural.
If a take shows motion nicely but the label distorts, use the motion clip briefly and cut to the original still for the text. If the product itself changes shape, revisit the source crop or choose a less ambitious move. Judge the next take against the same issue before changing the model, duration, and prompt together.
Once the motion works, check the shot beside the rest of the demo. A clip used for a reveal can end as soon as the product is clear. If you need a stable end frame for a cut, use a smaller move and inspect the last second before exporting.
For the full upload and preview workflow, see how to turn an image into a video.